1. Start the trial
Press “Try for 14 days” on first start. The program works fully without a key for 14 days; no account and no internet connection needed.
2. Add the parts
Drop LXD, DFT and DXF part files into the Parts window. Quantity and thickness are read from the file name when they are written there, and you fill in the rest.
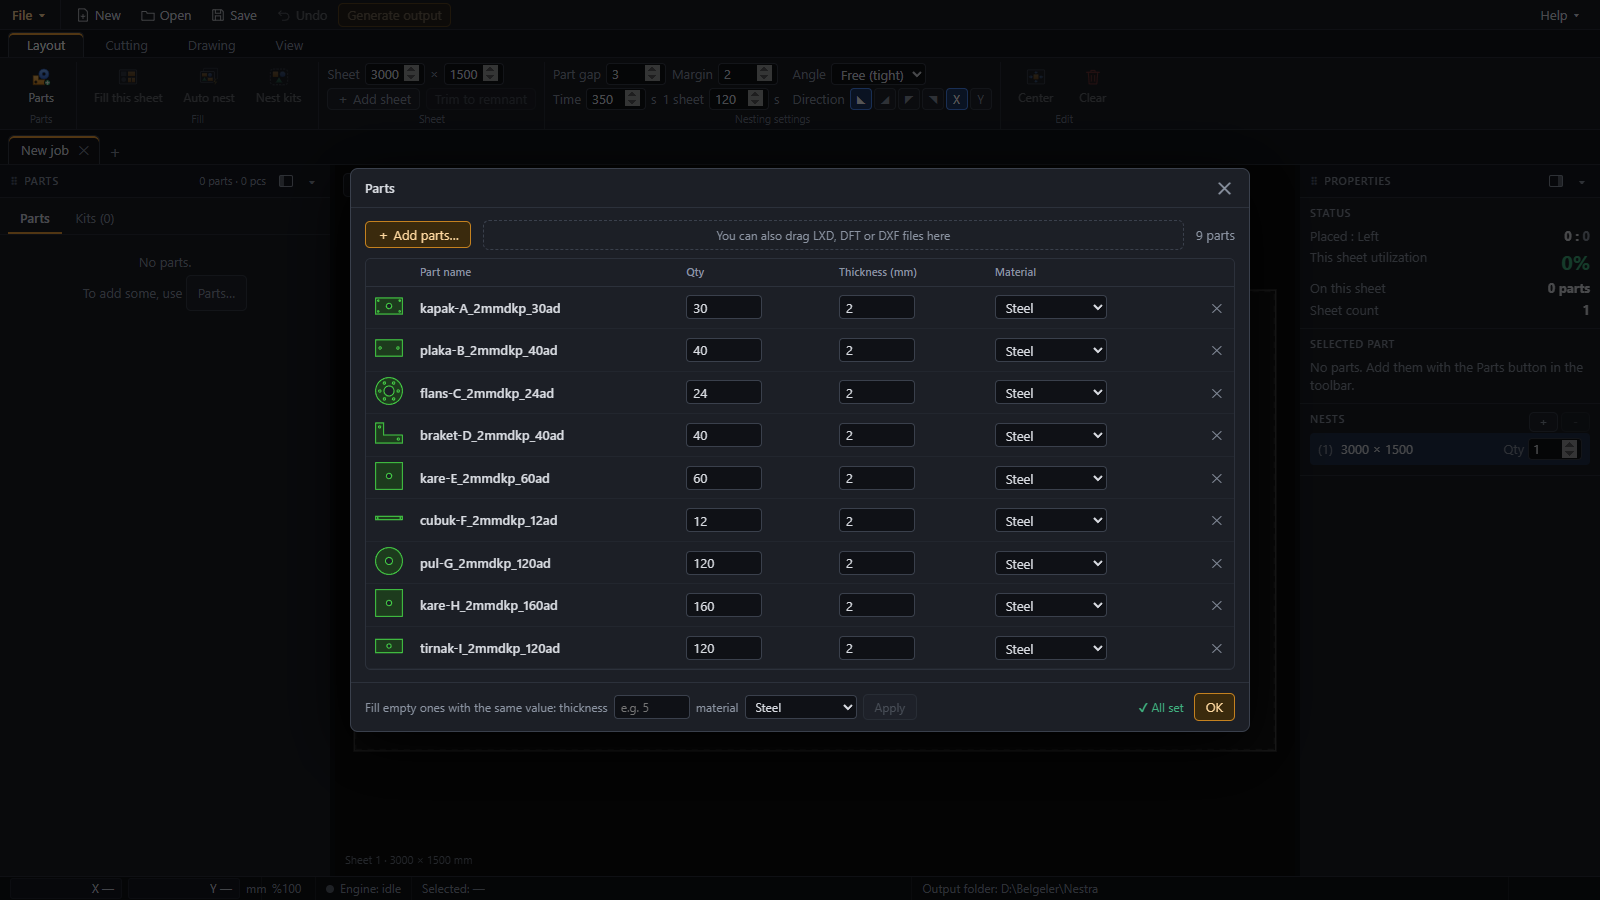
DXF: lines, arcs, circles and LWPOLYLINE are read. SPLINE, ELLIPSE, blocks (INSERT) and old-style POLYLINE are not read yet and are skipped, so a part may come in incomplete. Check the part shape in the part list before nesting.
When parts are cut as sets, define a kit and say how many you need; Nestra nests only complete kits.
3. Choose the sheet size and nest
Tick the sheet sizes you have in stock and press Auto nest. Nestra tries each size, shows all sizes side by side in a table and suggests the one that leaves the least scrap.
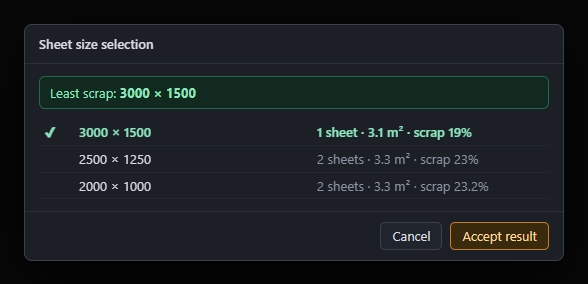
You set how long the engine runs. The screen always shows the best layout so far; press Stop at any moment and you keep what is on the screen.
4. Cut off the remnant
A remnant line is added after the last part, so the unused end of the sheet comes off as a clean remnant and goes back to stock. You can move it, delete it or turn it into a stepped line that follows the parts.
5. Check the cutting order
Nestra sets the cutting order for you: the sheet is cut in strips from the start corner, holes are cut before the outer contour of each part. Lead-ins are placed automatically on a safe corner. Click any contour to move a lead-in or change its length.
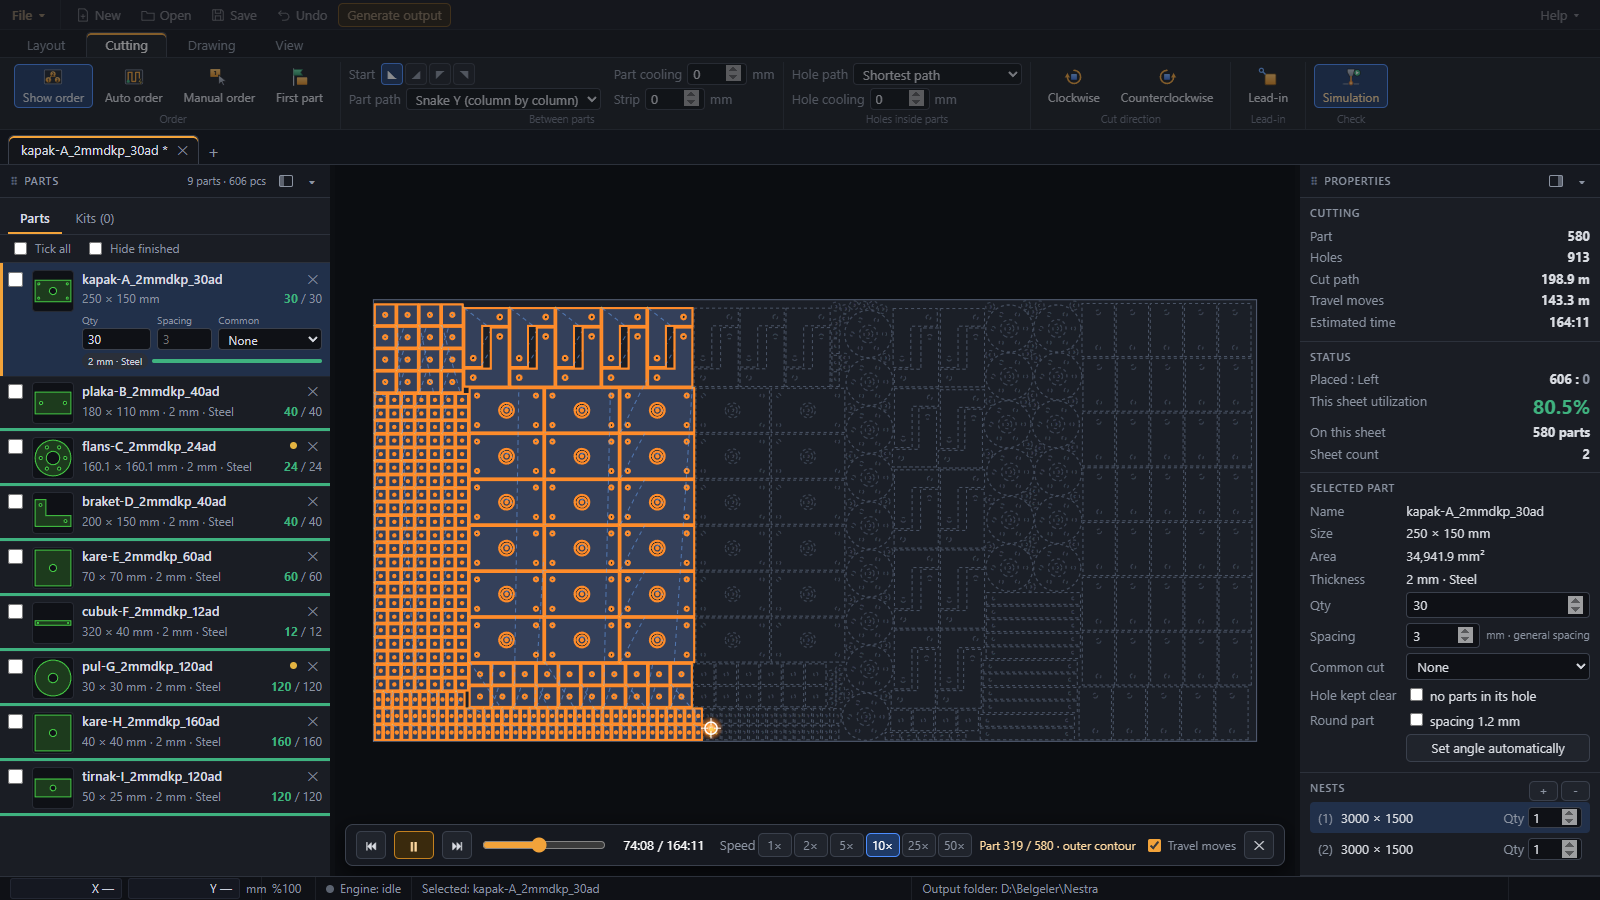
The simulation plays the cut on screen so you can check the order before the sheet goes on the machine.
6. Generate the output
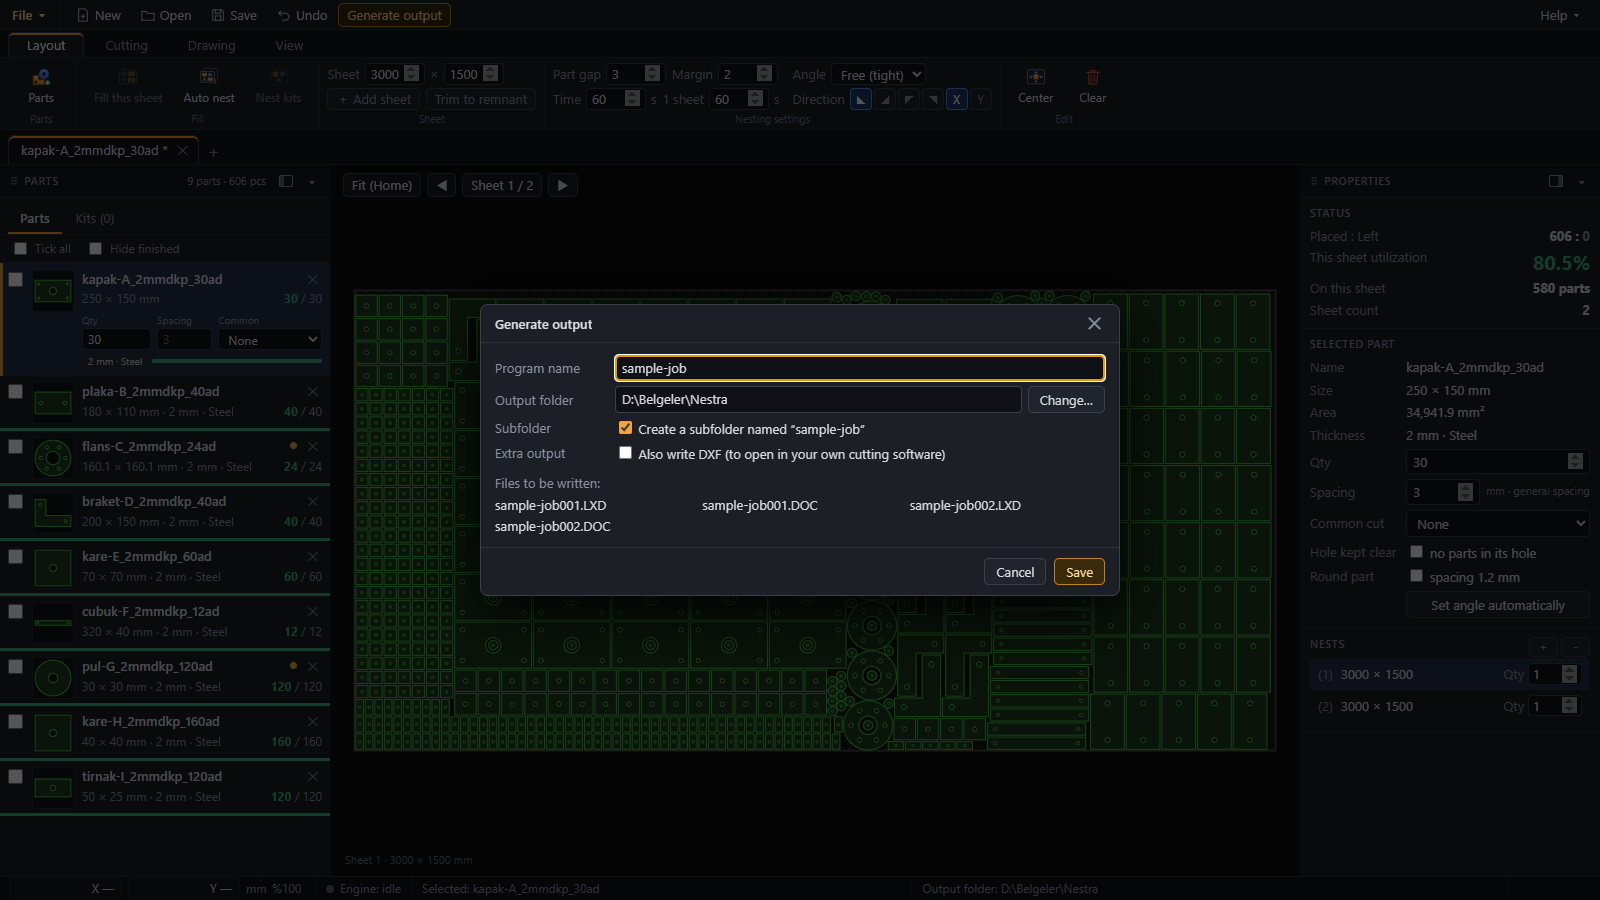
For every layout Nestra writes an LXD file and a DOC sheet report, and a DXF if you want one. The report shows the sheet picture, material, utilization and an estimated cutting time. Output can go straight to the folder your cutting machine reads from.
7. Check it on your first job
Check on your first job that your cutting software opens our LXD and DOC files. Do not go to production before testing with your own files.